
update as of 12 & 13 Oct, 2024
Underwater Bubbles Test
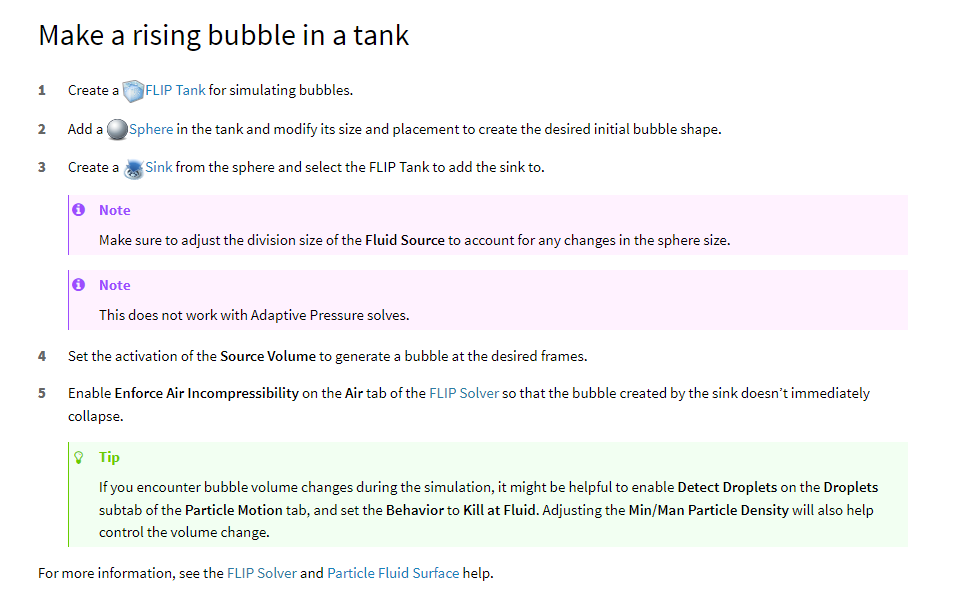
For the underwater bubbles, the SIGGRAPH paper David shared suggested using air pocket data from FLIP/APIC simulations, which led me to explore that approach. While researching, I also found a similar method in the Houdini documentation. The key steps are:
a. Enabling Air Incompressibility in the FLIP solver so that air pockets don’t dissipate immediately.
b. Creating a FLIP source as a sink, using the RBD apple.
c. Importing the FLIP source as a volume source into the volume velocity attribute of the FLIP solver.
d. For meshing, under the Particle Fluid Surface node, using the spherical method and enabling the Preserve Bubbles option to ensure proper bubble preservation.
This, along with the addition of smaller bubbles using whitewater, is the current approach for the simulation.
from Houdini 20.5 documentation
from Houdini 20.5 documentation
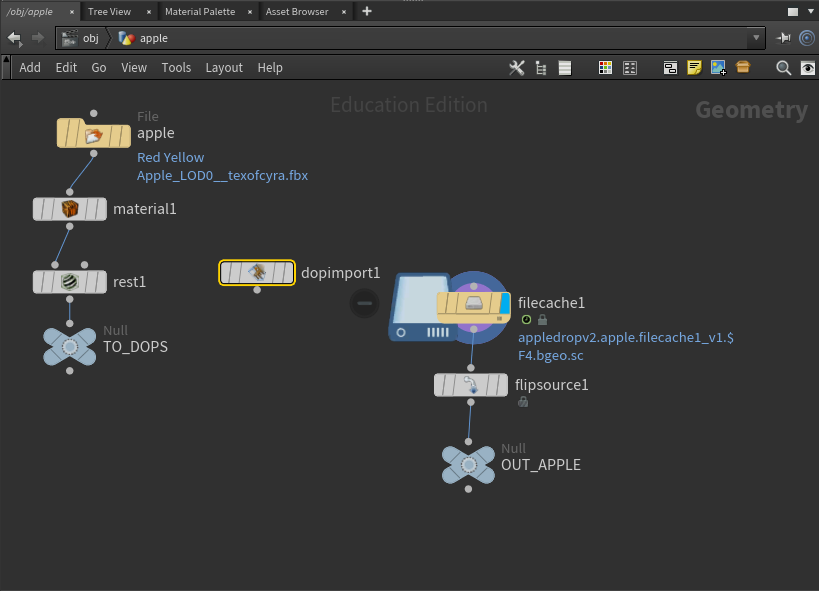
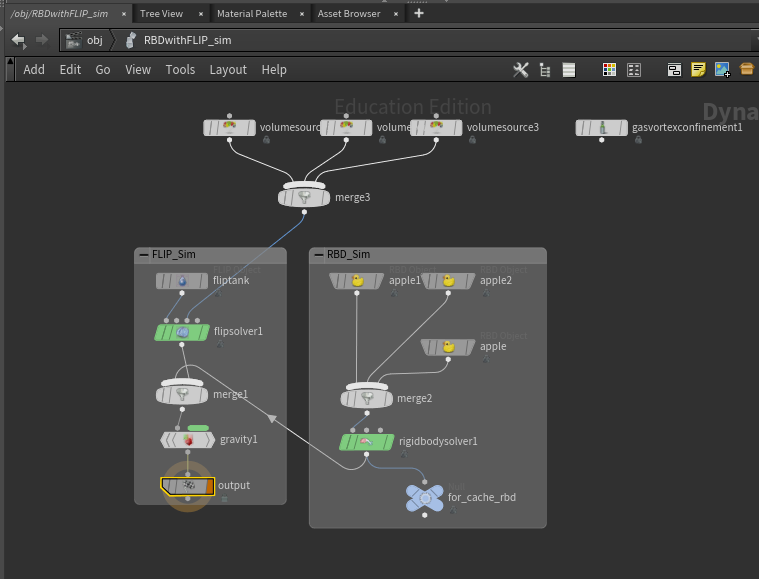
1.RBD Apple to FLIP Solver
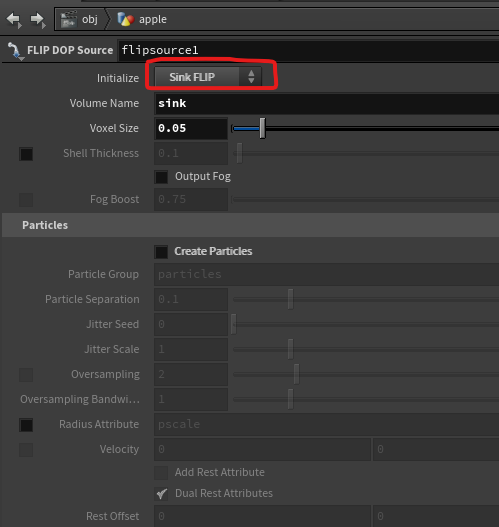
2. RBD Apple's Flip Solver Settings
3. RBD Apple's Flip source import as Volume Source
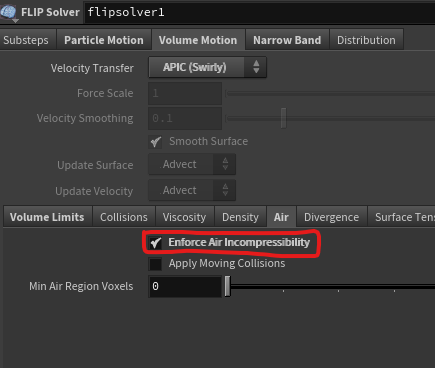
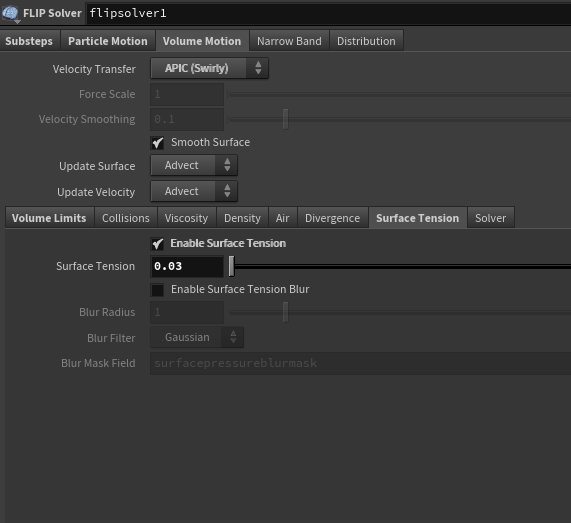
4. Flip Solver's Air Incompressibility setting
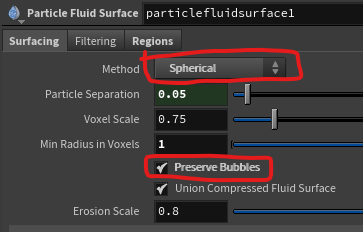
5. Meshing Settings
update as of 11-Oct-2024
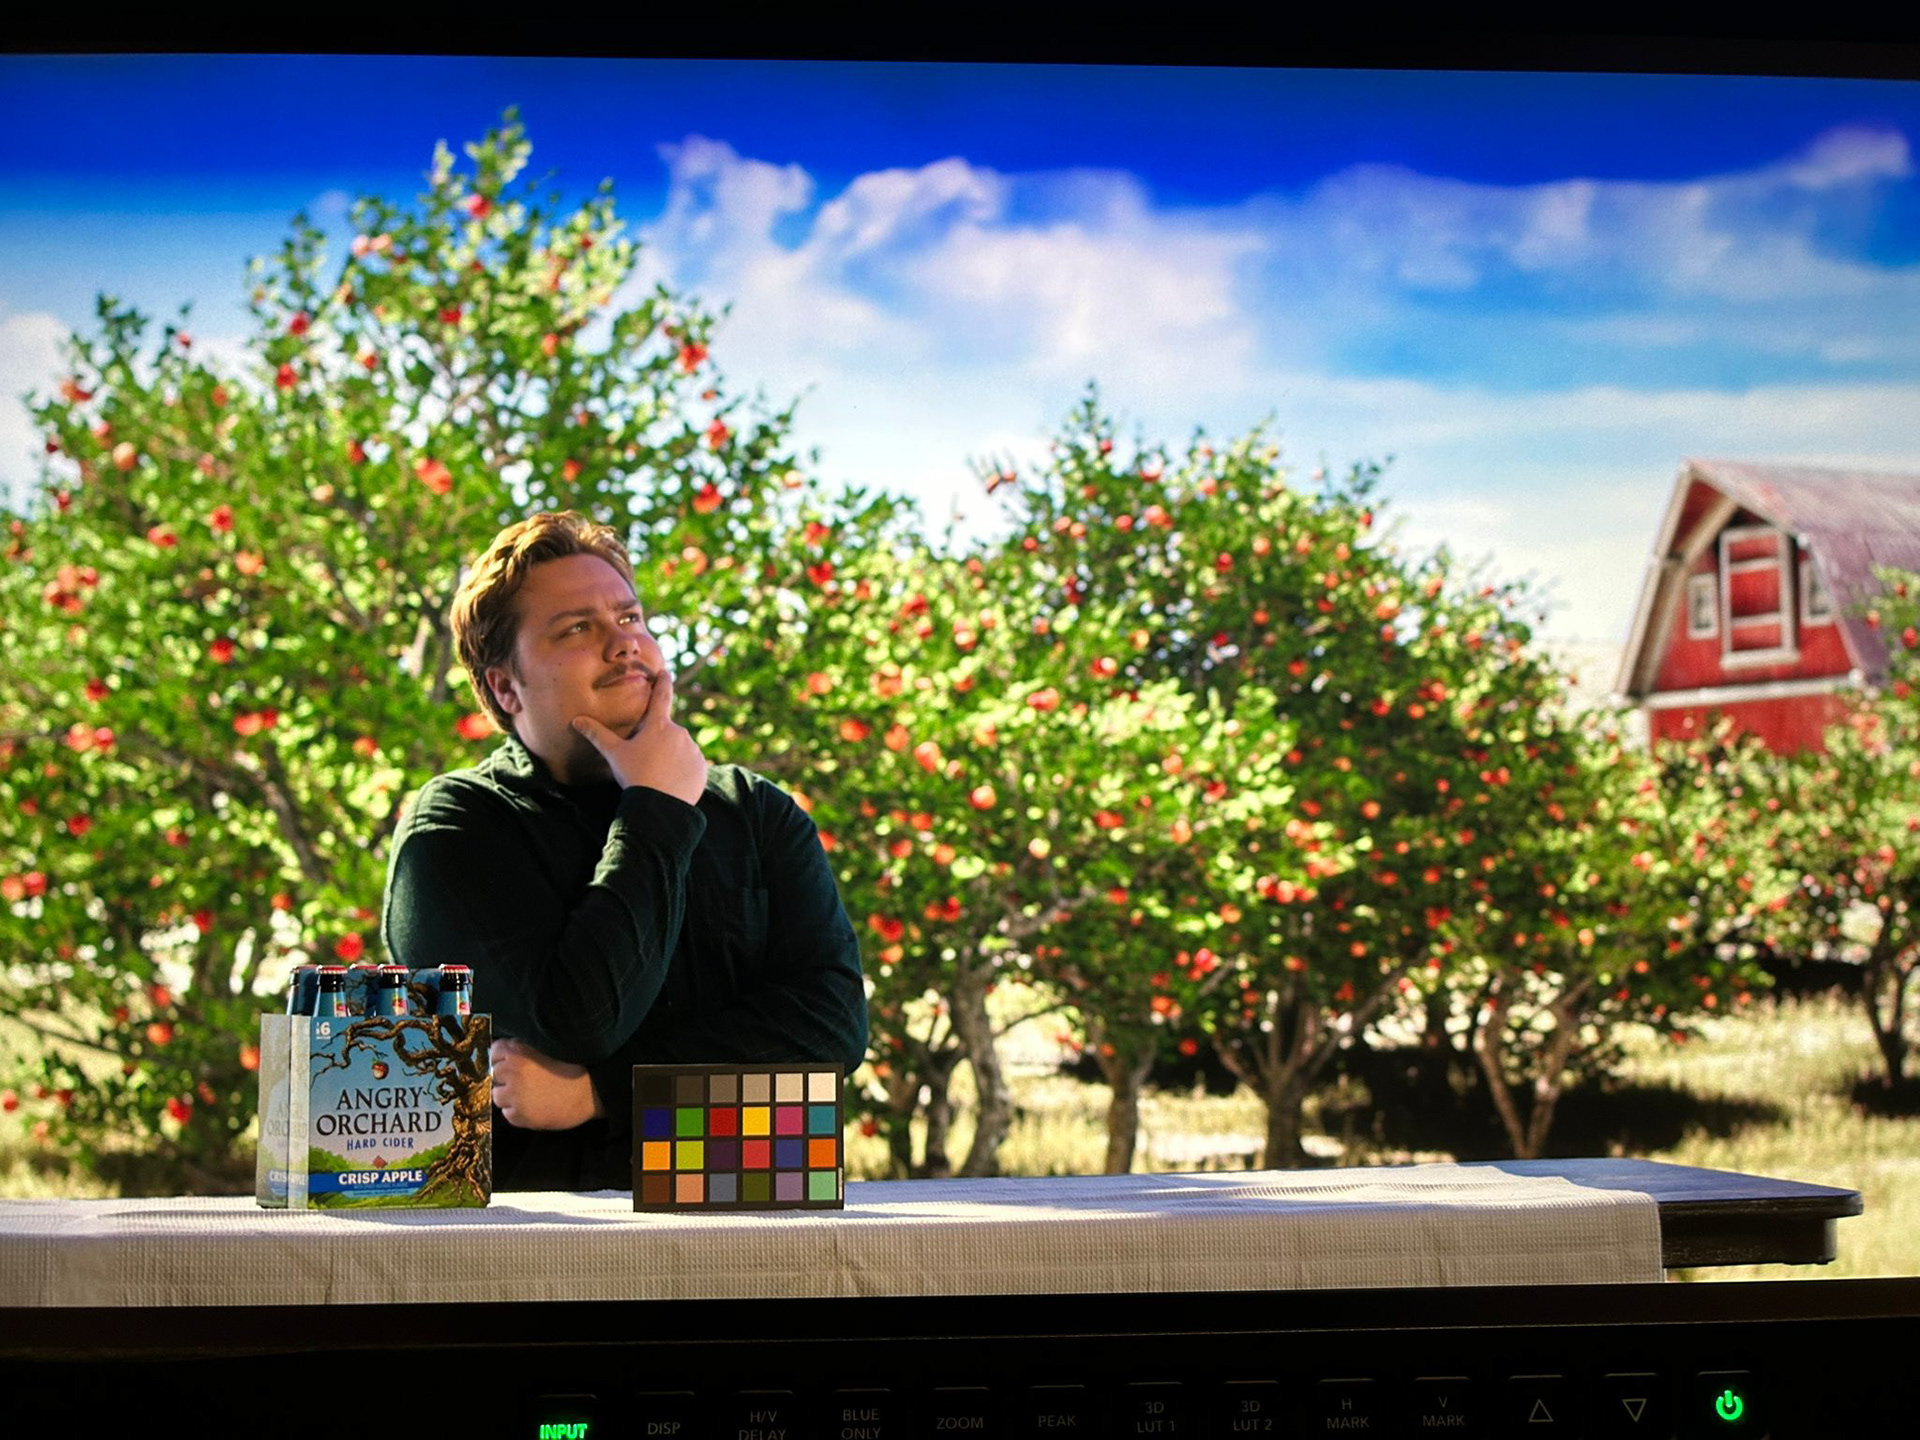
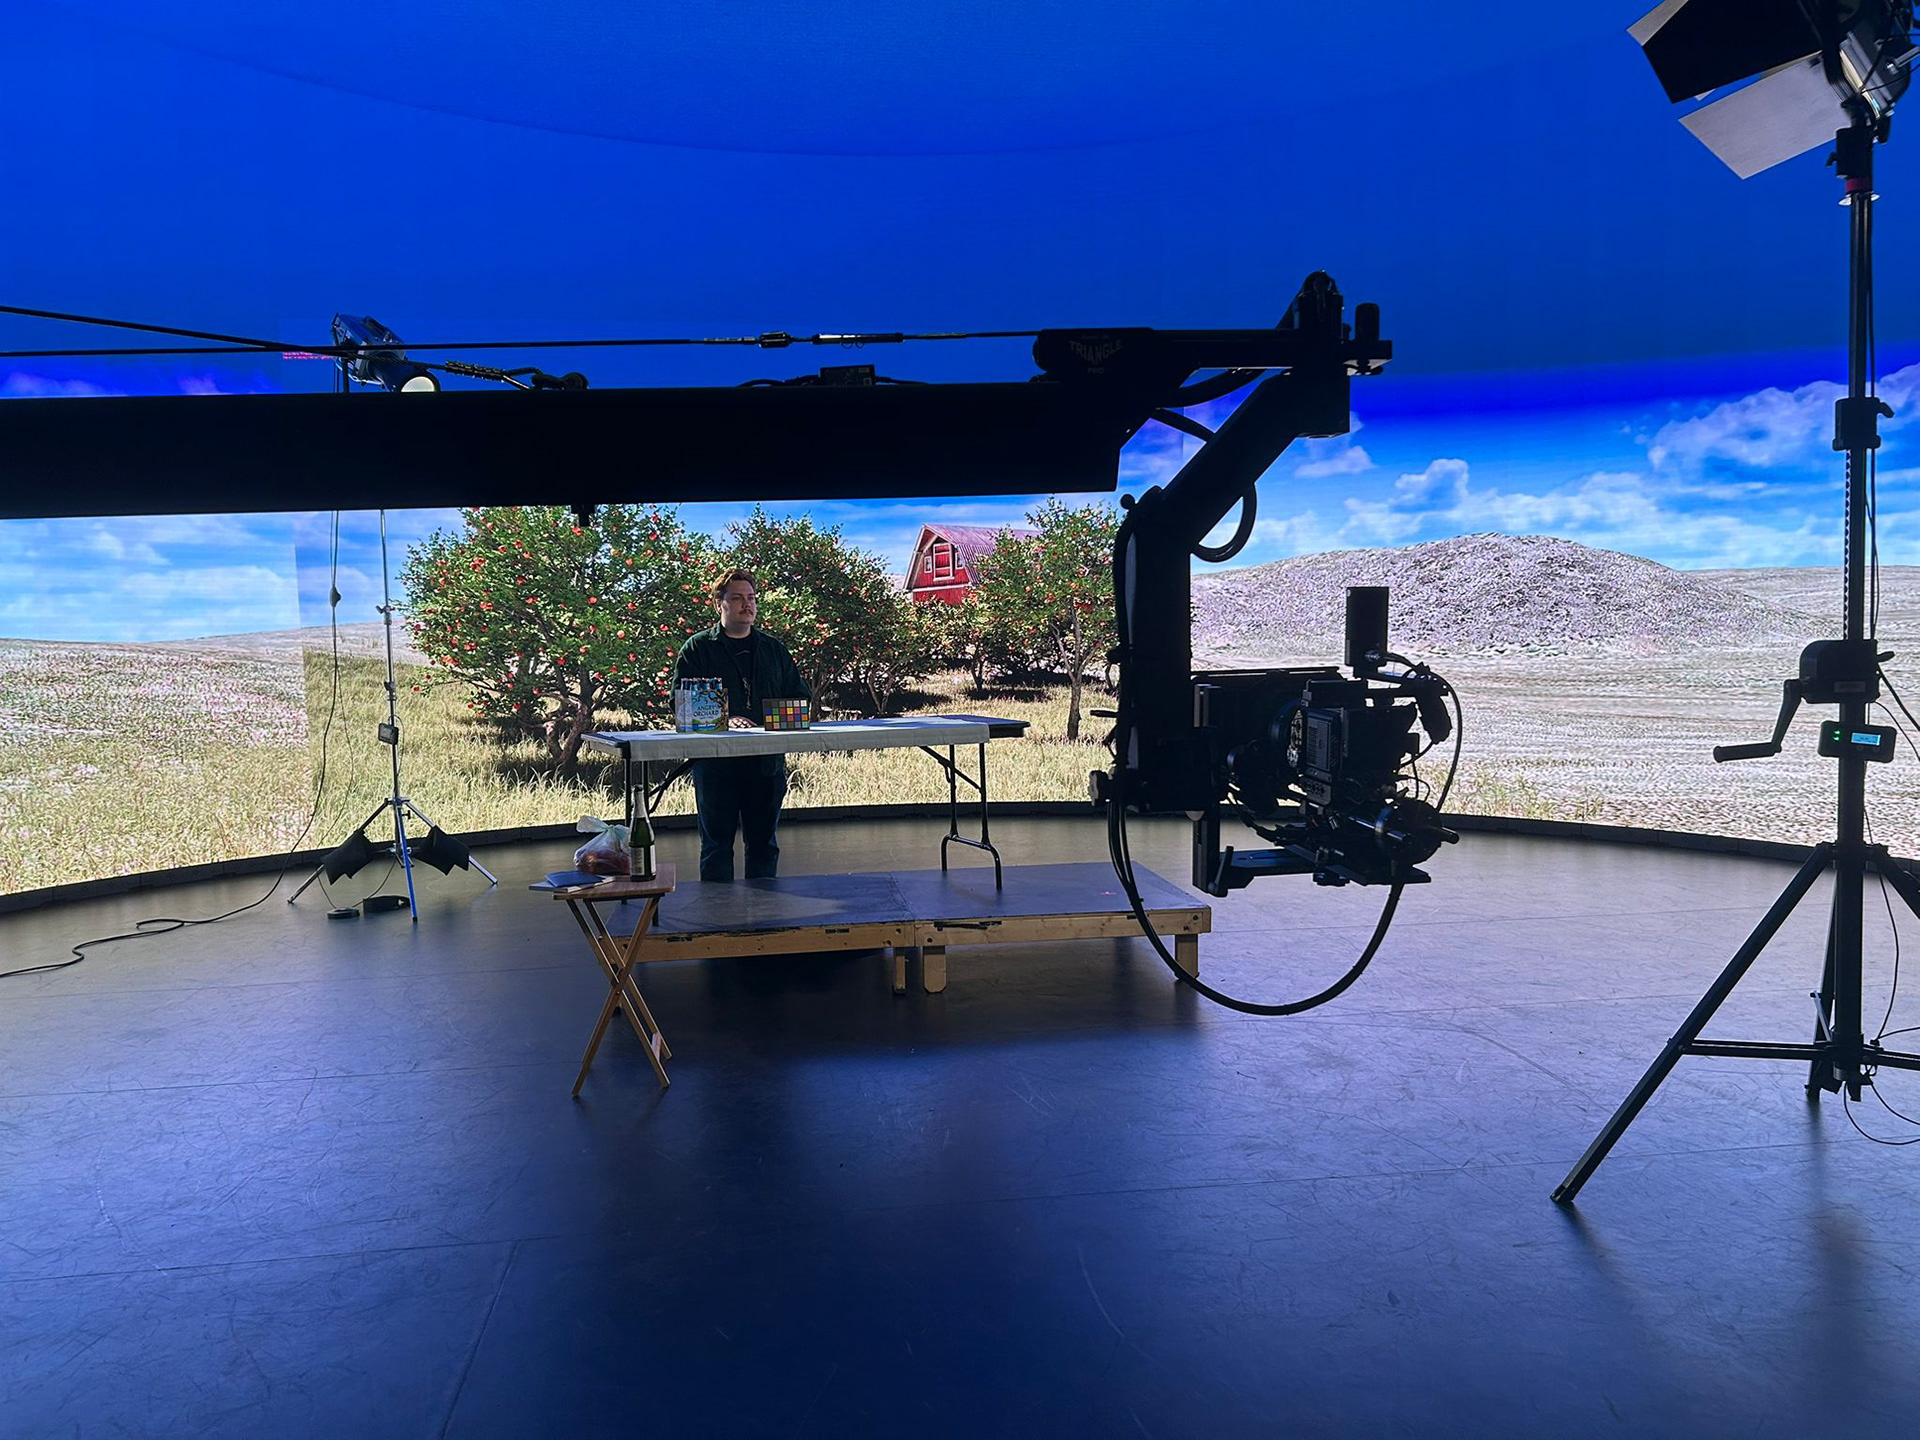
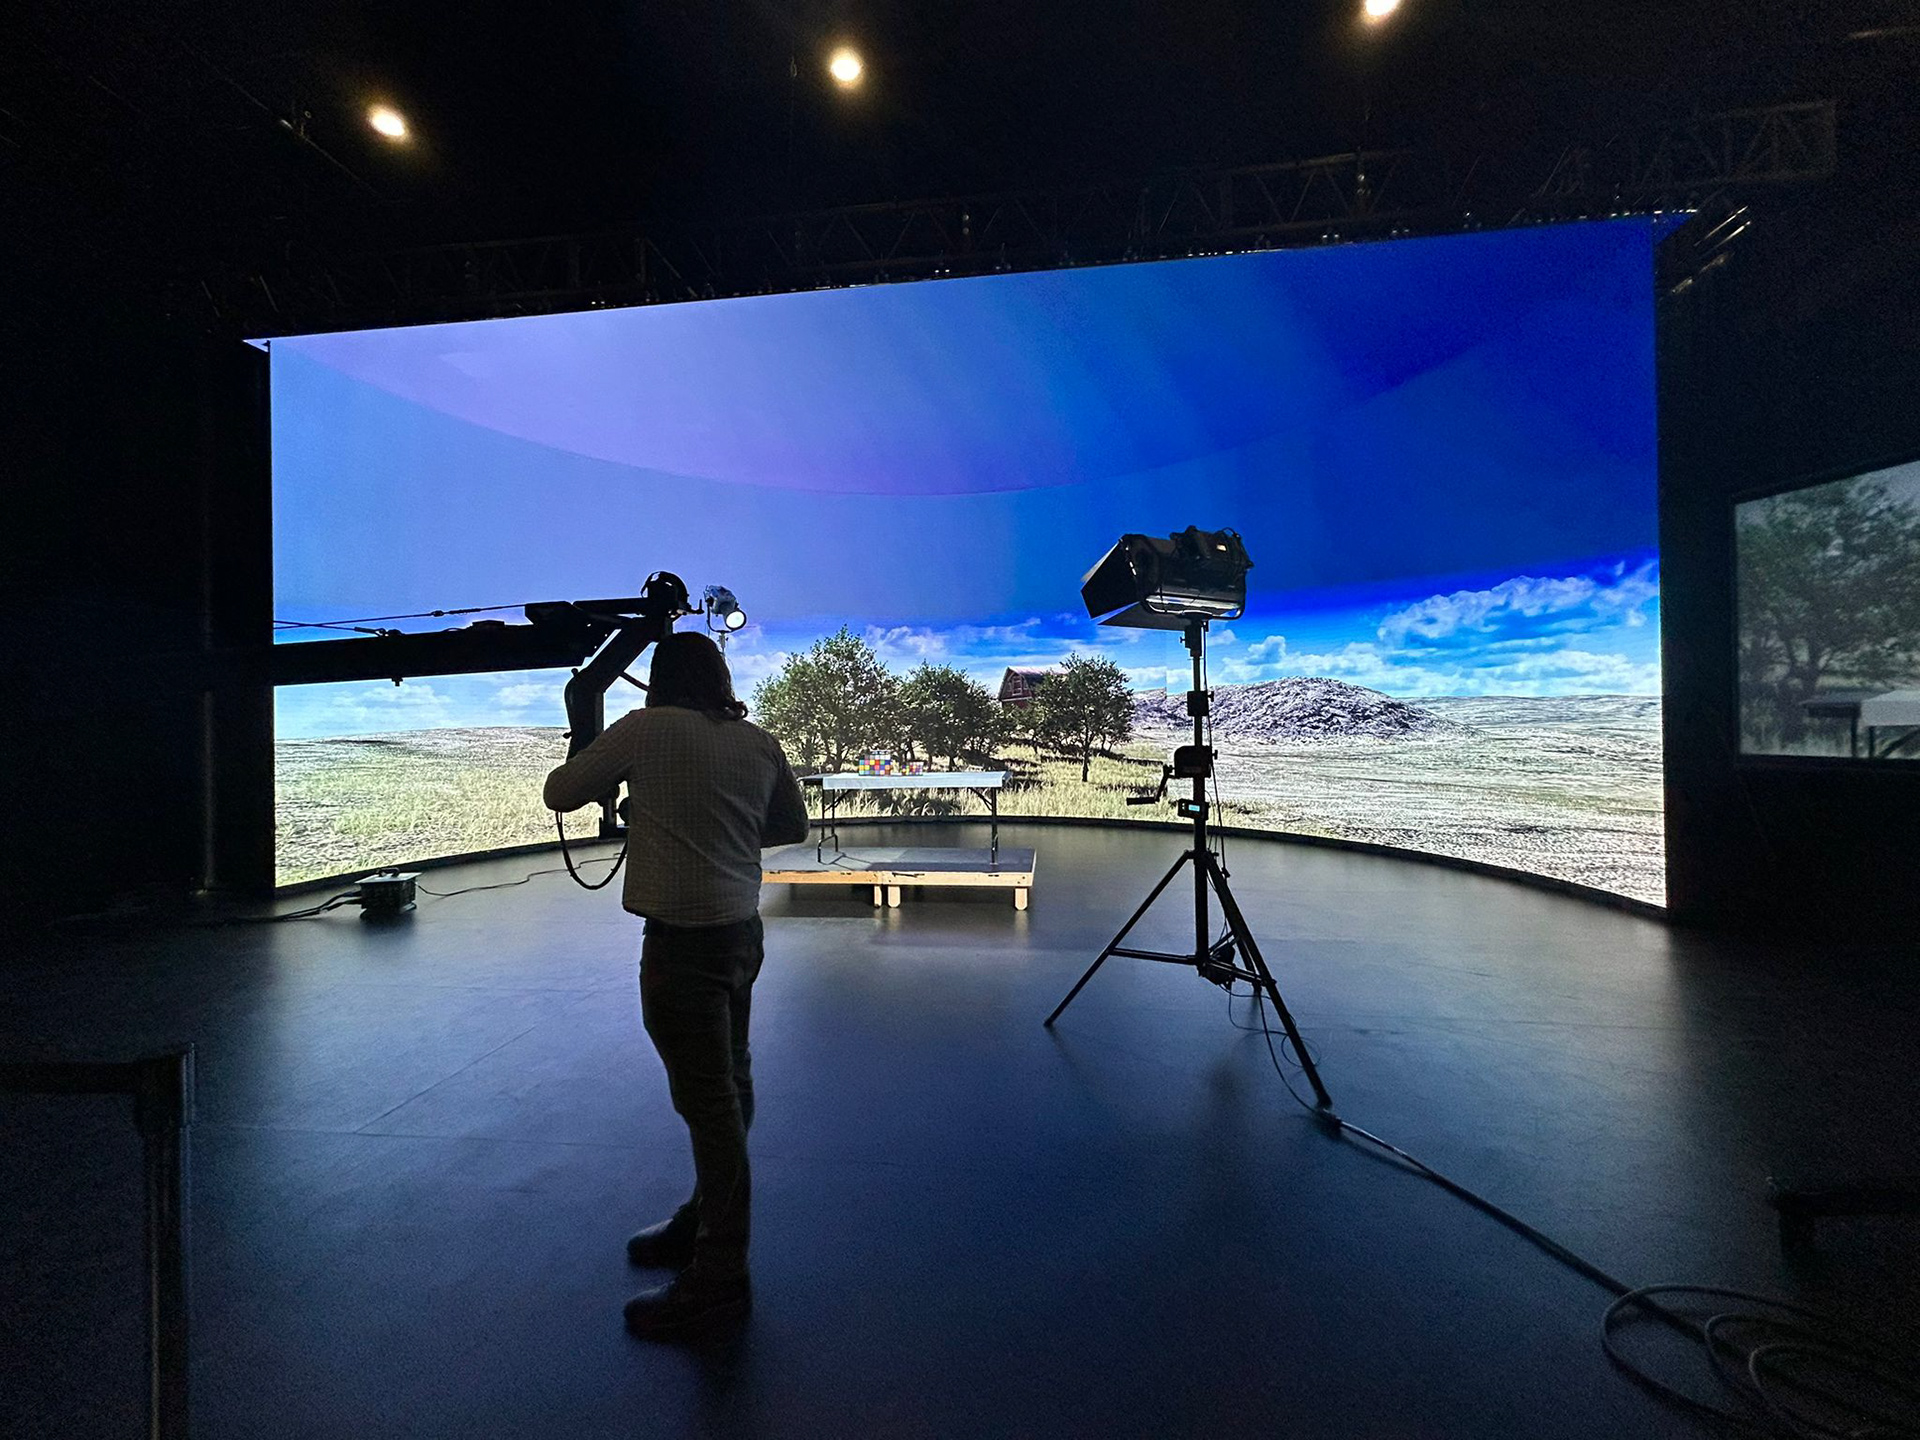
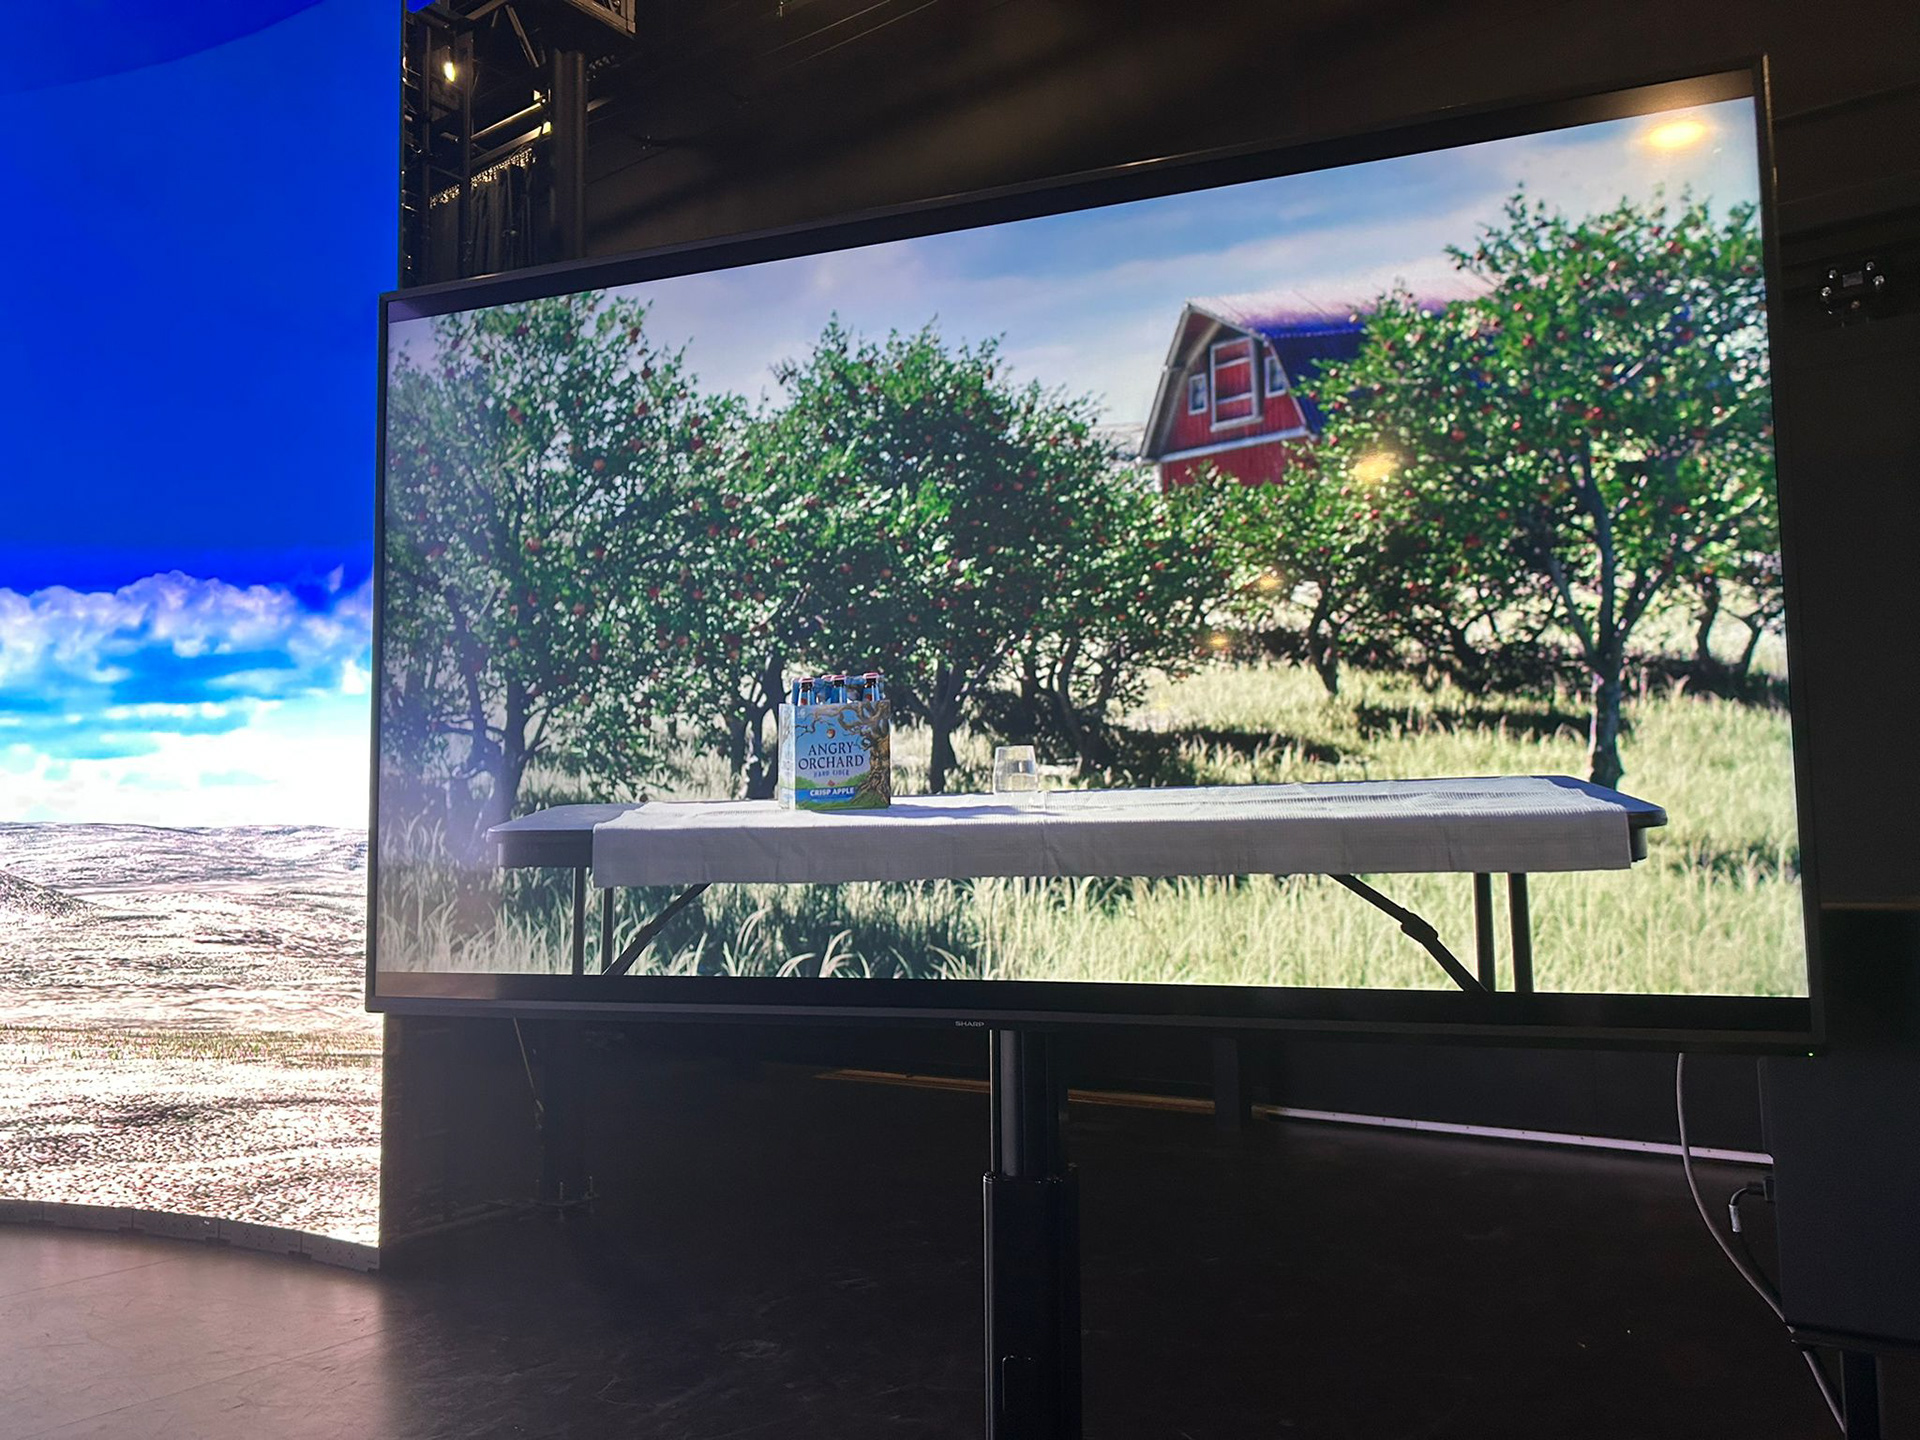
TEST Shoot on the xr Stage
We had the incredible opportunity to shoot at the XR stage, which turned out to be one of the most memorable experiences of this project. It was an amazing time for us as a team. Donnie set up the scene in Unreal, though we encountered a frame rate issue initially. To resolve this, he had to remove the wind effector from the grass maps, which improved the FPS significantly. Donnie also stepped in as our actor, while Ben and I handled the camera, and Chris directed the shoot. Together, we set dressed the scene, and we were all really pleased with the results.
A huge thanks to the XR stage team, who were incredibly helpful and supportive throughout the process.
For the next shoot, we’ve identified a few adjustments to make:
a. Use a new tablecloth.
b. Get a taller glass.
c. Rearrange the trees slightly to fill the scene better.
d. Adjust the texture of the barn's roof. e. Reduce the density of the grass maps.
update as of 10-Oct-2024
Load and lighting test for the XR shoot
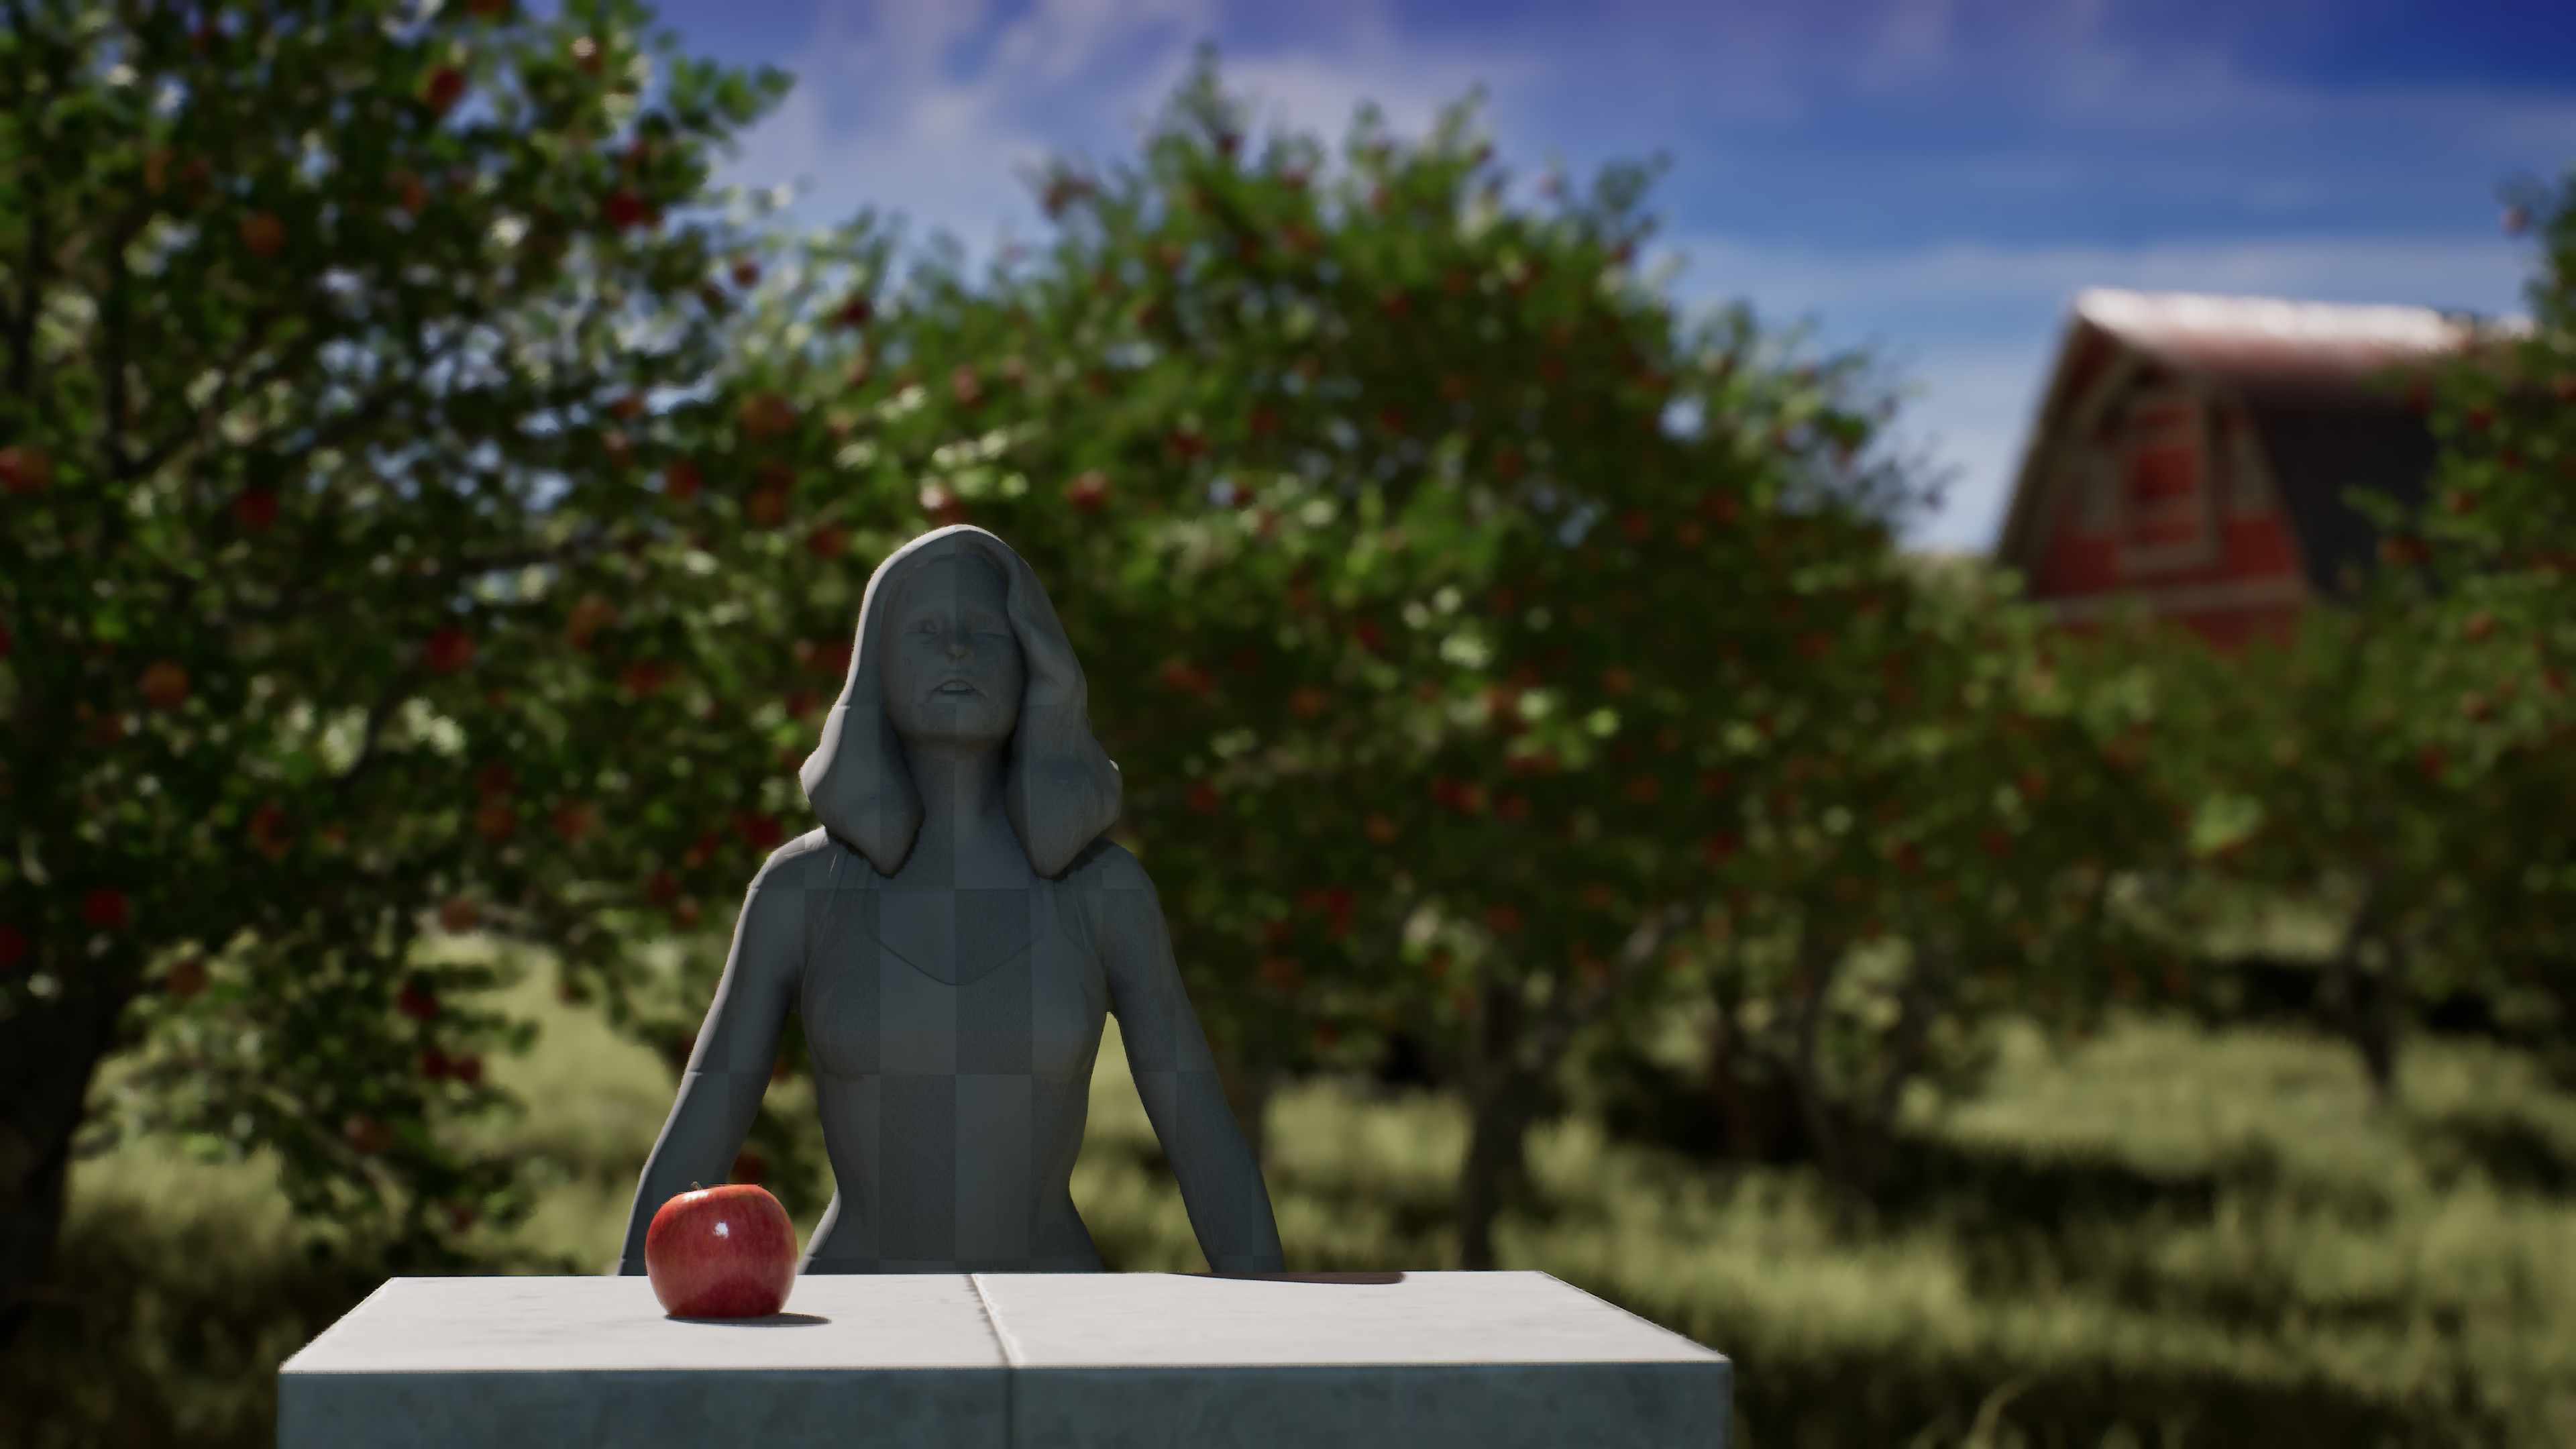
As a team, we conducted a lighting test with Donnie’s assistance to prepare for the upcoming shoot. We positioned an actor of similar height to our cast to determine the best way to light the XR stage on the day of the shoot, helping us refine our lighting approach for effective production. Additionally, we tested the scene’s frame rate to ensure it could run smoothly at 60 fps on the XR stage, confirming that the technical requirements would be met without performance issues during filming.
update as of 08-Oct-2024
Feedback from Emily:
a. The transition between shot 1 and shot 2 could be smoother. She asked if we plan to keep the warp effect that was used.
b. She also wondered if shot 3 will stay as it is or if we plan to add more set dressing.
c. She suggested that shots 5 and 6 could flow more cohesively.
b. She also wondered if shot 3 will stay as it is or if we plan to add more set dressing.
c. She suggested that shots 5 and 6 could flow more cohesively.
Feedback from Mazyar:
a. He recommended adjusting the timing for shots 2 and 3.
b. He suggested that the splash could serve as a transition between shots 6 and 7.
c. For shot 6, he proposed that the camera could move in rather than out.
d. For shot 5 (apple drop), he mentioned that it might be better if the camera doesn't track the apple by moving back up.
b. He suggested that the splash could serve as a transition between shots 6 and 7.
c. For shot 6, he proposed that the camera could move in rather than out.
d. For shot 5 (apple drop), he mentioned that it might be better if the camera doesn't track the apple by moving back up.
Feedback from David:
a. He thought the splash looks better but suggested adding tendrils at the end, perhaps using a separate simulation.
b. He recommended focusing on the best parts of the simulation and cutting it when the splash starts wrapping around the bottle, rather than playing it through.
c. He suggested that the color of the barn should stand out more.
d. For the bubbles, he advised looking at references and a SIGGRAPH paper for further insights.
Tasks for the week:
a. Create two variations of the splash simulation.
b. Modify shot 3 to include the apple drop.
c. Provide updates on shot 4.
d. Add tendrils to the splash in shot 6.
e. Composite shot 1.
f. Adjust the barn color to make it stand out more.
g. Conduct a test shoot at the XR stage.
h. Edit the footage for the sound designer.
i. Work on the simulation of the bubbles.
update as of 07-Oct-2024
Render Test of splash shot
In the latest splash simulation, the object sizes were changed to match real-world scale, and this showed how sensitive Houdini is to scale during simulations. Surface tension was also added to improve how the splash looks, making the fluid behave more realistically. These adjustments made the splash look much better and more natural.